Updated October 2026 · By Bencke’s Tile
What subway tile is
Subway tile is a rectangular tile, most often 3 by 6 inches, that is set in a brick-like pattern. The name comes from the tile used in subway stations, and the look has stayed popular because it works in almost any kitchen. Today the name covers many sizes and finishes, from glossy white to handmade glaze.
The shape is simple, which is why the details show. A straight line looks better than a crooked one, so how the tile is planned and set matters more than the tile itself.
Choose the layout before you buy the tile
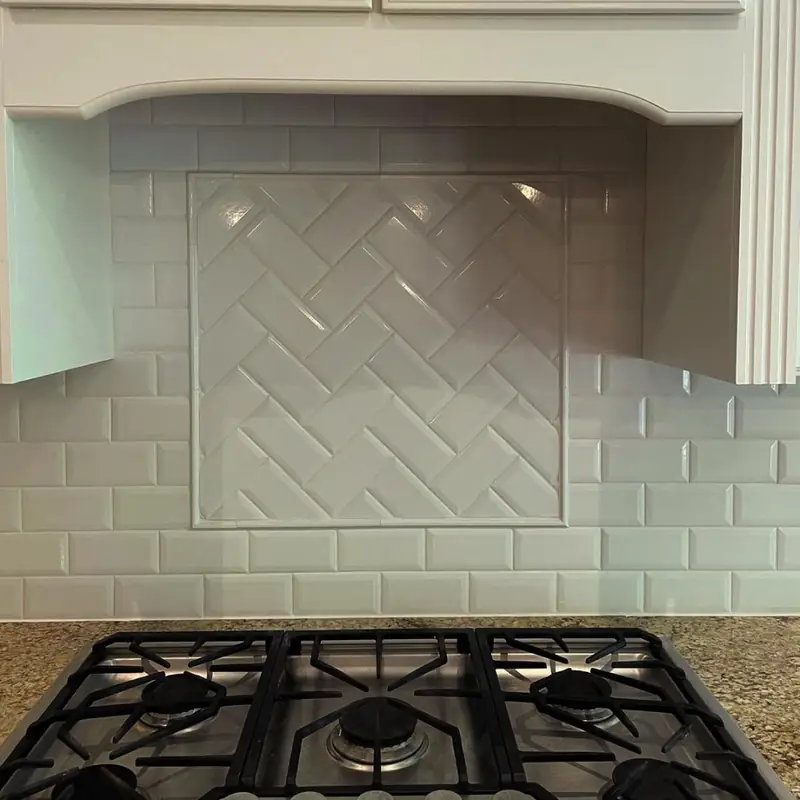
The most common layout is running bond, where each row is offset from the one below, like bricks. Stacked, where the joints line up, gives a cleaner and more modern look. A vertical layout draws the eye up. And a herringbone panel behind the range, like the one below, adds a focal point inside a plain field. The tile patterns guide explains each layout and the extra tile it needs.
Order more tile than the wall measures. Cuts, breakage and mistakes use some, and a pattern like herringbone uses more. It also helps to keep a few spare tiles for future repairs.
Plan from the middle, not from the corner
Tile the wall on paper before you touch thinset. Find the center of what the eye lands on, usually the range or the window, and plan the rows from there so the cuts at each end are even and not tiny slivers. Mark where the outlets, switches and the vent hood land, and check the height. A backsplash can stop under the upper cabinets, or run up to the hood or the ceiling.
Do not trust the countertop to be level. Most are not exactly. A common method is to draw a level line a little above the counter and build the rows up from it, then cut the bottom row to fit the counter. That keeps every row level, and the cut is hidden by the caulk line.
Prepare the wall
Tile needs a clean, flat, solid wall. Remove grease, patch holes and loose paint, and check that the wall is flat. If you are replacing an old backsplash, the wall behind it can be damaged when the old tile comes off, and drywall repairs are part of the job. Protect the countertops and the cooktop, and turn off the power at the breaker before you work around outlets.
Setting the tile
The tile is pressed into thinset spread with a notched trowel, one small area at a time so the adhesive does not skin over. The notch size and the type of thinset depend on the tile and are printed on the labels, so follow them. Press each tile in with a slight twist and check that the tile is fully bedded, with no hollow spots. Spacers keep the joints even, and a level or straightedge keeps the rows true.
Around outlets, the tile gets cut to fit, and the box usually needs an extender so it still sits flush with the new surface. Windows take a tile return or a trim on the sill. Cuts take time, and they are where a job shows its quality.
Grout: color and type
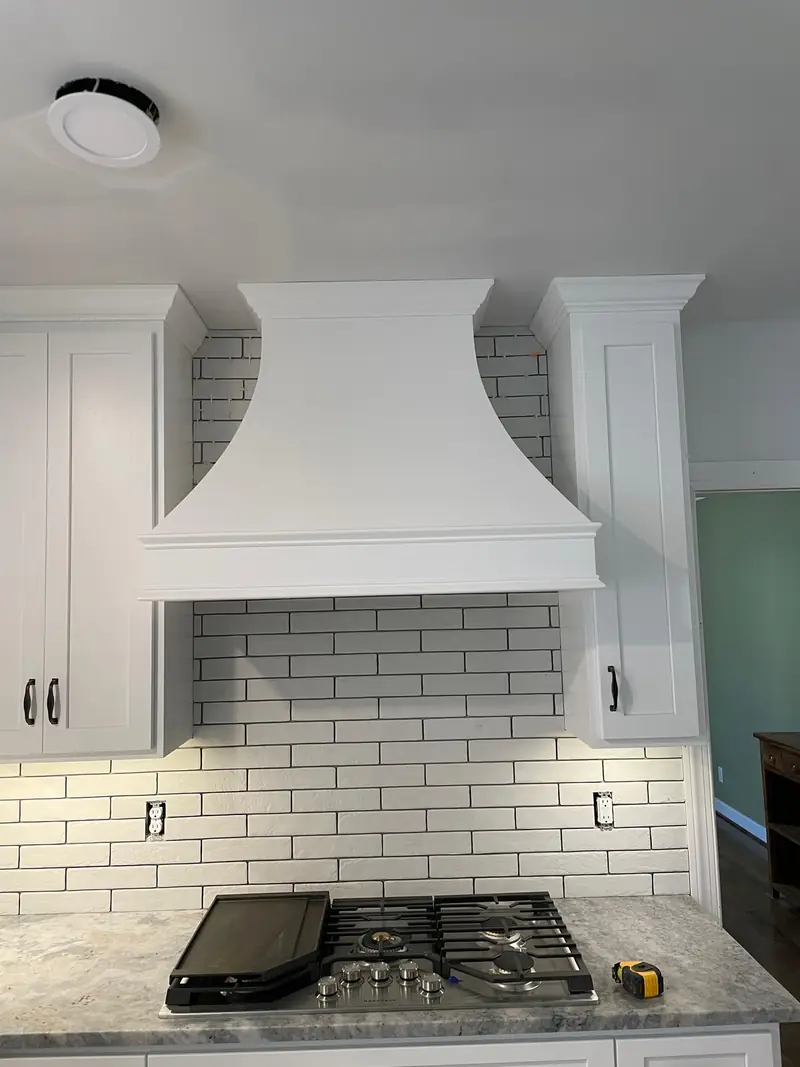
Grout color changes the whole look. Matching the tile makes the wall quiet. A darker grout draws every tile in outline, as in the photo below, where white subway tile and dark grout look crisp behind a cooktop. The grout type depends on the joint width, and epoxy grout resists stains, which is useful behind a stove. Read the grout types guide to choose.
Wait for the thinset to cure before you grout. The time is on the thinset label, and it is often about a day. Wipe the haze off the tile with a damp sponge as you go.
Finish the edges
The edge of the tile is the part people see most. A cut edge looks unfinished, so there are a few ways to deal with it. A bullnose tile has a rounded finished edge. A metal edge profile gives a thin, modern line. A pencil liner, a narrow molding tile, makes a classic border. And a backsplash that runs all the way to the ceiling has no top edge to finish at all.
Decide on the edge before the tile is ordered, because a trim piece has its own thickness and color. At the sides of a backsplash that ends against a wall or cabinet, the same choice applies.
Caulk the corners and the counter
Where the tile meets the countertop, and in the inside corners, use a flexible caulk in a color that matches the grout, not grout. These joints move a little as the house settles and the counter expands, and rigid grout cracks there. The caulk line also hides the cut at the bottom of the first row. The same advice appears in the grout guide.
What a subway tile backsplash costs
HomeAdvisor (updated 2026) says subway tile installation costs $7 to $13 per square foot, and that the cost to install a subway tile backsplash in a kitchen could be $1,300 to $2,400. The same page also gives an average near $1,000, so its own numbers vary. Bob Vila (updated 2023) lists labor for backsplashes at $20 to $35 per square foot, and a kitchen backsplash at $600 to $1,300 with materials and labor.
The sources do not agree, because they count different things: tile only, labor only, or both. These are market figures, not Bencke’s Tile prices. For the labor side in detail, read tile installation cost per square foot.
What you need
The materials for a subway tile backsplash are the tile, thinset made for wall tile, grout, flexible caulk, spacers, and any edge trim. The tools are a notched trowel, a level, a wet saw or a tile cutter for straight cuts, nippers or a small saw for the curves, a grout float, sponges and buckets. A wet saw makes the cleanest cuts, and the dust and the water mess are why many homeowners prefer to hire it out.
Around the range and the window
Two spots need extra thought. Behind the range, check the maker’s instructions for the space between the cooktop and the wall, and plan the tile to stop at the right place. At a window, the tile either returns to the sill with a finished edge or ends at a trim piece.
Mistakes that show
Rows that drift off level, joints that change width, tiny slivers at the ends, tile that sticks out from the wall around an outlet, and grout haze left to dry. Almost all of them come from skipping the layout and the prep. A backsplash is a small area with a lot of attention on it, which is why the care shows.
Next step
If you want a backsplash done, Bencke’s Tile does kitchen backsplash work in the Richmond area, and you can see what it covers on the kitchen backsplash page. The estimate is free and in your home, so you get a real number for your kitchen.